Wednesday, October 23, 2013

Interior doors and mouldings

Interior Doors

Sticking with our farmhouse feel we chose this arched door with the beadboard inset.


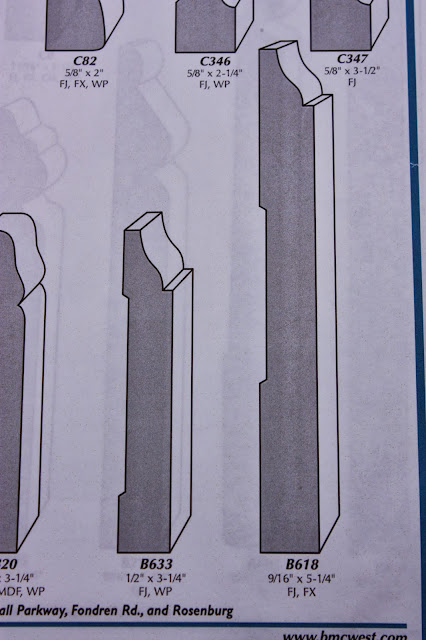
We wanted a tall base board which reminded us of the feel of older homes.  The one on the bottom right is 5 1/4 " tall but simple and straight forward.


We also picked out our crown moulding, who knew it how complicated that could be.  I didn't get pictures of that so you will have to wait to see.

Drywall, taping, floating and fixing a mistake

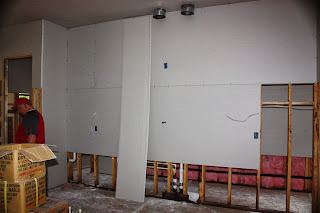
Drywall Completed
Taping and Floating Begins


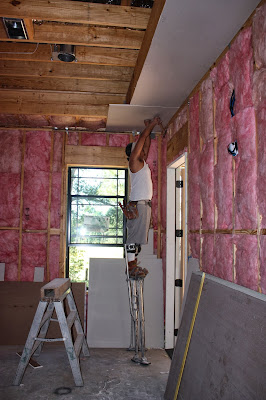
The drywall goes up quickly since they hang it with only a couple of nails to keep it in position.  Then they have to come back and secure them firmly to the studs with drywall screws.  As you can imagine, this process takes a little while, about 4 days .
 
Taping and floating is also expected to take a full week.
 
Every seam and corner gets taped and mudded and all the edges get softened with a molding.  Each and every hole gets filled.  Seems overwhelming but with the right tools even this small crew of two makes good progress.


This tool is a taping gun that has a roll of tape loaded in it and then filled with mud.  This allows the tape to come out pre-mudded which really simplifies the process.  I wish I would have had one of these for all the drywall projects I've done over the years.


We had a cool front this week with the nights dropping into the upper 40s, which made for great working conditions, however, it kept the mud from drying very quickly.

 
After the sharp corners and cheese grater walls in our previous home, we are looking forward being injury free in the new house.  We asked for softened corners which are pretty standards these days.  They use this plastic corner molding for all the edges.  It is flexible too which makes it ideal for the arched doorways as well.

 
The mudding was nearly completed, when Uriah noticed that the washer hook ups were in the wrong place, they would have been in the middle of the laundry room counter tops.  So at 5 pm we decided to fix the problem ourselves since the next day they were to begin texuing the walls.  Thank goodness for Jim's Hardware just a few minutes down the road because the closest big box store is 35 minutes away.  Luckily I had taken pictures of the walls before they were covered in drywall, so we were able to see exactly what we would need to do to move the laundry box.


All we had to do was move the white box over one bay to the right.  If we would have noticed it when it was at this stage, it would have been a piece of cake to fix.  But no, we were there fixing the problem till about 10 pm.  But now Uriah will not have to fix this in the future.

 
 The little white box is now covered by the brown paper since they were to begin texturing soon.


Monday, October 14, 2013

The Pink and the White House

Insulation completed and Drywall begins


First they used the expanded foam to seal the corners and seams. 
Then came back with the cotton candy batting.


I really want a pair of these stilts, how awesome would that be for dusting or changing a light bulb?


The black strapping holds everything in place until the drywall gets installed.
 
 
The guy on the stilts is Jose, he owns the drywalling company. 
 I have to say, all of the subcontractors have been really great guys.
Once these huge pallets of drywall got dropped off, they wasted no time getting down to business.


They work from the ceiling down.  These two guys are working on the master bedroom.

 
The Great Room

 
The back wall of the kitchen, where the stove will be.

 
This is my studio upstairs

 
Same room, from the window looking in.
Next week they should begin the taping and floating.
 
The house really seems to be becoming a home.  Everything feels less massive now that the walls are in place and the echos are gone.  Now I have to yell to find my hubby.


Thursday, October 10, 2013

Cool Concrete

Concrete Stains
 
This week we met with David, the decorative concrete guy.  The concrete flooring has to be done before the insulation and drywall can be installed.  We are putting a large compass rose in the foyer, we already had the direction of true north marked out for him so there were only a few other issues...largely the color.  We had already picked out and provided some color samples for David to work with.  He laid down a few samples for us to choose from.
 
 
David stressed to us multiple times that the floor will appear much lighter than the samples when applied to the whole floor.  We wanted something a little darker than the first 4 samples.  David custom mixed a few more blending some of the walnut (2) and saddle brush (4).
 
 
It was difficult to reach a decision since the colors look vastly different based on where you are standing in the room.
 

This is only a few feet from where the first picture was taken. 

 
We were leaning towards the one on the far right but ultimately picked the one on the left and had David hand paint additional walnut undertones.
 
While we were picking out colors, the crew was prepping the floors.  This consisted of first sweeping then vacuuming.  Next, they brought in a hose and literally hosed the floors down and mopped them till perfectly clean.  They blocked off the entries and turned on the fans.  The floors had to dry for a full 24 hours prior to the application of the first coat.

The Compass Rose


The star will be completed in alternating dark and light stains.  There will also be a boarder defining  the foyer, it will appear as an entry rug.


See anything odd about the compass rose???   It can be fixed.


Exterior nears completion

The Exterior is nearly completed. 
The masons worked for 5 days laying all the stone and brick.  We chose a tumbled stone which means they did a lot of cutting to use the same stone as the cap for the brick.  They really are artists of their craft.  There were two guys laying the stone on the front of the house, they would sort through the stones to find the perfect one for every space.  Then they would sometimes lightly modify it to fit perfectly together. 


The older guys said they had been doing masonry work for nearly twenty years.
The young guy (with the long sleeves), assists the others.  He mixes the mortar and makes sure the others always have what they need, whether it's a different stone, mortar or a different tool.


The finished product turned out beautifully.  They will return towards the end of the build to clean the brick and stone with an acid wash to get off all the excess mortar and dirt.